The Ronnie Rig Explained: A Simple Guide for Beginners

As an Amazon Associate we earn from qualifying purchases. This page contains affiliate links — if you buy through them, we earn a small commission at no extra cost to you.
The Ronnie rig gets mentioned in a dozen YouTube videos and a few forum threads, but the hype can leave you wondering if it’s just extra faff. If you’re standing on the bank of a day-ticket fishery with a basic setup and a modest budget, the honest answer is: it’s a solid, beginner-friendly choice, but it isn’t a magic bullet. Here’s exactly what the rig is, how it behaves on common UK lakebeds, how to tie it yourself for a fraction of the cost, and when you might be better off with something simpler.
What the Ronnie Rig Actually Is
At its core, the Ronnie rig is a loop-and-hair rig with a swivel sitting on the lakebed. You tie a small loop about a centimetre from the hook eye, which lies flat on the bottom. The hair, attached to the hooklink, carries your bait. A swivel sits between the loop and the hair, which stops the hook from rotating and gives the whole rig a stable, flat profile.
This simple arrangement means the rig works on silt, gravel, sand, or light weed without the spin-up you get with many spinner rigs. Korda Tackle describes it as a “360°-rotating hook setup” that still “sits flat on the bottom”. In practice, UK anglers report that the low profile lets wary carp take the bait without feeling a sudden tug, which is why it’s become a favourite on mixed-bottom club waters.
Put simply, it’s a loop-and-hair presentation that sits flat, using a swivel for stability. It’s forgiving on silt, gravel, or light weed and is ideal if you want a reliable, low-maintenance rig without the complexity of a helicopter or chod.
Why It’s Different from a Chod or Helicopter Rig
It helps to see where the Ronnie rig fits among other common carp setups.
- Chod rig: Uses a stiff hooklink to lift the bait off the bottom. Brilliant on clean gravel, but it can snag or spook fish on silty or weedy beds.
- Helicopter rig: The bait sits on a hair while the lead hangs on a swivel above. Good for distance, but the swivel can spin and the boom section can get caught in weed.
- Ronnie rig: The loop sits directly on the bottom, the hair holds the bait, and the swivel just keeps everything flat – no lift, no spin.
| Feature | Chod Rig | Helicopter Rig | Ronnie Rig |
|---|---|---|---|
| Bottom Contact | Lifts bait | Hovering | Flat loop |
| Weed Tolerance | Poor | Fair | Good (hair stays clear) |
| Snag Risk | Low on gravel | Medium (boom) | Low if loop is small |
| Best For | Clean gravel | Long distance | Mixed lakebeds |
The common feedback from UK club anglers is that the Ronnie “holds better than a chod because it doesn’t snag on debris” on silty venues. Because the swivel doesn’t rotate, you also avoid the worry of a spinning rig pulling the hook out during the fight – a genuine benefit when you’re starting out.
How It Works on Real UK Lakebeds
The Ronnie rig’s strength is its adaptability to different conditions.
- On Silt: The loop sinks into the soft bottom, presenting the bait just above the silt’s surface. Carp that are wary of sudden movement often take the bait confidently because the hooklink isn’t lifting it.
- On Gravel: The loop rests flat on the stones, while the hair lifts the bait slightly. It’s still a natural presentation that works well on most day-ticket pits.
- On Weed: The loop can occasionally snag in dense weed, but the hair stays clear, keeping your bait visible. A quick “wiggle” of the rod tip can often free a snagged loop without losing the bait.
Remember, this rig is a presentation tool, not a snag-fixer. Anglers on weedy club waters report it “holds up nicely” as long as the loop is kept small — roughly 20–25mm, about the diameter of a 10p coin. On silty venues, the loop’s ability to embed itself gives a subtle, almost invisible bait profile that many UK forum users rely on.
Step-by-Step Tying Guide
Tying your own Ronnie rig is straightforward and saves a fair bit of money. Here’s how.
- Tie the loop. Make a small overhand knot about 1–1.5cm from the hook eye. Pull the tag end tight so the loop sits flat when you cast.
- Attach the swivel. Thread the loop through a small spinner swivel (a size 4 is common) and secure it with a simple crimp sleeve on the swivel’s eye.
- Tie the hair rig. On the opposite end of your hooklink, tie a standard hair rig using a loop knot. Make the hair about 2–3cm long to hold your boilie or pop-up.
- Apply shrink-tube. Slide a short piece of heat-shrink tubing over the knot where the swivel meets the loop. Use a hair dryer to seal it – this hides the knot and adds a bit of stiffness to keep the loop tidy.
- Check your work. The loop should be roughly the size of a 10p coin. The hair should be long enough to let the bait sit clear of the bottom but short enough to avoid excessive wobble.
A common mistake is making the loop too big. A large loop can spin on the bottom or snag, which defeats the rig’s entire purpose. Keeping the loop tight and small is the key to a reliable build.
When to Use It — and When to Avoid It
- Use it on: mixed lakebeds, silty club waters, and venues with light weed where the hair can stay clear. It really shines on day-ticket pits with a blend of silt and gravel.
- Avoid it on: heavily snaggy waters with lots of twigs or dense weed, where the loop will inevitably catch. Also avoid ultra-clean gravel lakes where a simple hair rig or D-rig would give you more distance with less terminal tackle.
If you’re at a pit with a hard, clean gravel bottom, a straight hair rig is often a better choice – the Ronnie’s loop adds no real benefit there. But on a lake where the bottom is a patchwork of silt and weed, its flat presentation is usually worth the small amount of extra effort.
Common Beginner Mistakes
A few simple errors can stop the rig from working properly. Here’s what to watch for.
- Too much shrink-tube. Over-coating the loop makes it stiff and unnatural, which can reduce bite rates.
- Wrong hook size. Using a hook that’s too large for your bait can cause a poor hook-hold. A size 4 or 5 is typically spot on for 12–15mm boilies.
- Loop too big. As mentioned, a large loop spins and snags. Keep it around the size of a 10p coin.
- Skipping the pre-cast check. Before each cast, give the loop a quick tug. If it wobbles, tighten the knot.
These points come up repeatedly in DIY rig discussions on forums like CarpChat. Fixing them usually turns a half-working rig into a dependable one.
What Hookbaits Work Best
Bottom-baits tend to sit best on the Ronnie’s hair.
- Boilies: 12–15mm sweet or nut-flavoured boilies are ideal. Sticky Baits Manilla (paid link) is a popular choice reported to work well on silty waters.
See Sticky Baits Manilla price on Amazon → (paid link)
- Pop-ups: Small pop-ups work nicely on gravel, where the loop sits flat and the bait lifts just enough to be visible.
- Wafters: On mixed beds, a light wafter keeps the bait off the bottom while still presenting a natural profile.
Avoid overly large baits that can drag the loop into the bottom or cause the hair to bend too much.
Cost Comparison: Ready-Made vs. Tie-Your-Own
Is it worth buying a ready-made Ronnie rig or tying your own? The numbers are pretty clear.
- Ready-made rigs: You’ll find these for roughly £5–£12 each. They’re convenient, but quality varies — the most common complaint is poorly applied shrink-tube that fails on the first or second cast.
- DIY kit: A swivel (about 70p), a small piece of braid, a few hooklinks, and some shrink-tube will set you back around £1.50–£2.50 per rig. The extra few minutes pays off in reliability – owners consistently find DIY rigs more dependable because you control the knot quality.
If you’re starting out with £50–£100 to spend, tying your own means you can make roughly ten rigs for the price of one ready-made, leaving more in your budget for quality bait or a better rod.
A quick note: The Ronnie rig’s design has a fish welfare benefit. The swivel lets the hook slide into the carp’s mouth without the hooklink rotating violently, which can otherwise yank the hook out and cause tissue damage. This aligns with the Angling Trust’s guidance on low-impact carp fishing , which urges anglers to use rigs that reduce stress and injury.
Ronnie Rig vs. Other Popular Carp Rigs
| Feature | Chod Rig | Helicopter Rig | Ronnie Rig |
|---|---|---|---|
| Bottom Contact | Bait lifted | Bait hovering | Loop sits flat |
| Weed Tolerance | Poor | Fair | Good (hair stays clear) |
| Snag Risk on Debris | Low on gravel | Medium (boom) | Low if loop small |
| Setup Complexity | Medium | Medium | Low |
| Best For | Clean gravel | Long-distance casting | Mixed silt/gravel/weed |
| Beginner Friendly | No | No | Yes |
| Hook-Hold Stability | Good | Fair | Excellent (no spin) |
Frequently Asked Questions
Is the Ronnie rig good for beginners?
Yes. Its simple loop-and-hair design is easy to tie, forgiving on most UK lakebeds, and reduces the chance of snagging – all qualities that suit a newcomer’s first rig.
Do I need a swivel that spins?
No. The Ronnie uses a static swivel; its purpose is to keep the rig flat, not to rotate. A standard size-4 swivel is perfect.
Can I use the Ronnie rig on weedy waters?
It can work, but the loop may snag on dense weed. Keep the loop small and use a short hair so the bait stays clear of the vegetation.
What bait should I use with the Ronnie rig?
Bottom baits like 12–15mm boilies (Sticky Baits Manilla (paid link) is a reliable choice), small pop-ups, or light wafters all present well on the hair.
Is it worth buying ready-made Ronnie rigs?
For a beginner, tying your own is usually better value and more reliable. Ready-made rigs cost £5–£12 each and quality varies, while a DIY rig costs £1.50–£2.50 and lets you control the knot quality directly.
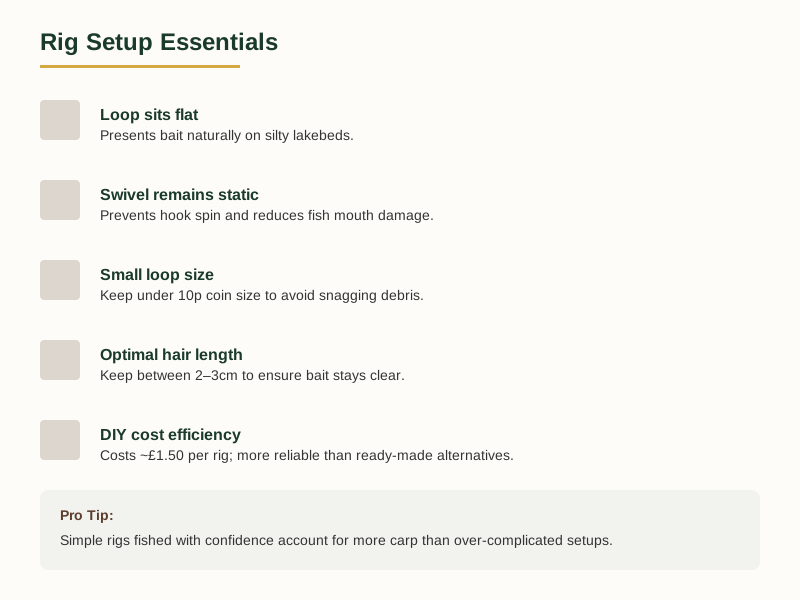
Ready to Start?
The Ronnie rig isn’t a miracle solution, but it delivers exactly what a beginner needs: a low-fuss, cost-effective rig that sits flat on silt, gravel, or light weed and treats the fish gently. Use it on mixed-bottom club waters, keep the loop small, and pair it with a sensible bait like a 12mm boilie. If you find the bottom is clean gravel, you might switch to a simple hair rig for extra distance.
Ready to lock in your plan? Download the Free Beginner Carp Fishing Checklist and walk into your next session with confidence, knowing you’ve got the right rig, the right bait, and the right knowledge to make the most of your day-ticket or club water.
About The Bite Guide Team Get in Touch Read more on the blog
Related Guides
For a complete overview, see our Carp Rigs Explained: A Complete Guide for UK Anglers .
As an Amazon Associate we earn from qualifying purchases.