How to Tie a Blowback Rig (Without Overcomplicating It)

As an Amazon Associate we earn from qualifying purchases. This page contains affiliate links — if you buy through them, we earn a small commission at no extra cost to you.
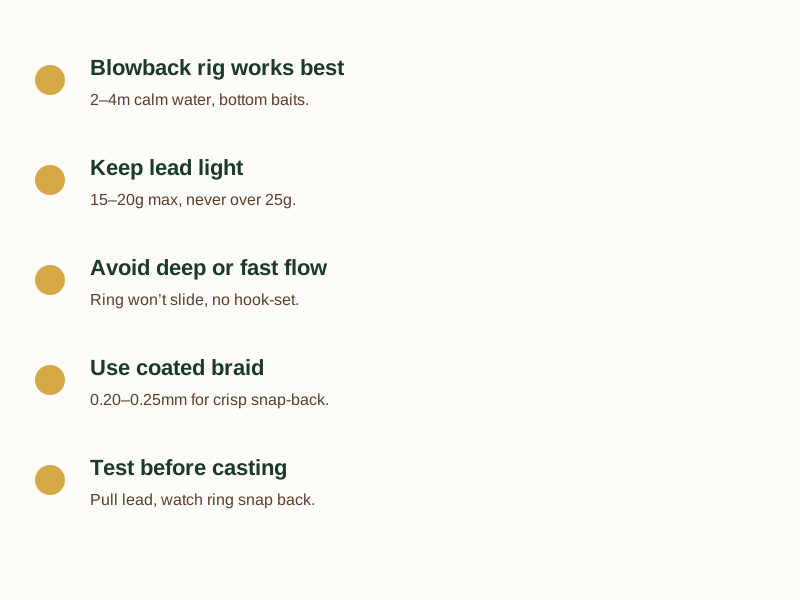
You’ve tied the blow-back rig three times and it still doesn’t set. You’re not doing it wrong — you’re probably using it in the wrong water. Most beginners think it’s a magic hook-set trick. It’s not. It’s a simple, low-budget system that only works when the conditions match. If your lead’s over 25g or the water’s deeper than 4m and flowing, this rig won’t hook your carp — no matter how neat your knot is.
Why the Blowback Rig Works (and When It Doesn’t)
The blow‑back rig is essentially a hair rig with a small rig‑ring that slides back along a short, semi‑stiff hook‑link the moment a carp mouths the bait. As the fish pulls the lead, the ring slides forward, the hook‑link snaps back, and the hook self‑hooks.
The action shines with bottom baits or wafters in water that’s 2–4 m deep, calm or slow‑moving — the typical depth you’ll find on most day‑ticket gravel pits. The ring keeps the lead clear of silt, so the hook‑link can move freely and the hook‑hold stays solid.
Anglers on UK club waters report that on silty or mixed lakebeds the blow‑back rig outperforms the Ronnie because the ring prevents the lead from burying itself. The downside appears when you push the rig beyond its limits:
- Deep, fast‑flowing water – the ring can’t travel far enough to generate the snap‑back, so the hook never sets.
- Lead > 25 g – the extra mass stops the ring from sliding back, killing the self‑hooking action.
If you fish a pit that’s over 4 m deep, or a river with a strong current, consider a chod or a heavy‑weight pop‑up instead.
The blow‑back rig creates a self‑hooking action by using a short, semi‑stiff hook‑link and a sliding rig‑ring. When the carp pulls the lead, the ring slides forward, the hook‑link snaps back, and the hook catches the fish automatically. It works best on moderate‑depth (2–4 m), calm water with bottom baits or wafters, and it fails when the lead is too heavy (> 25 g) or the water is deep and fast‑flowing.
What You Need to Buy (Budget‑Friendly Component List)
You don’t need a £200 “premium” kit to make a blow‑back rig work. Here’s what every UK beginner should buy, and roughly how much it costs:
| Component | Recommended option | Typical UK price |
|---|---|---|
| Hook‑link | 0.20 mm or 0.25 mm coated braid – Gardner GT N‑Trap or Korda Dark Matter (paid link) | £8 – £10 for 10 m |
| Hook | Size 6–8 wide‑gape – ESP Carp Raptor or Nash Claw | £2 – £3 each |
| Rig ring | Standard 10 mm ring (no branding needed) – pack of 10 | Around £2.50 at Angling Direct |
| Lead | 15–20 g inline lead or lead‑clip (suitable for day‑ticket waters) | £1 – £2 each |
| Bait | Bottom bait or wafter – Mainline Cell or Sticky Baits Manilla boilie | £0.30 – £0.45 per bait |
Prices are approximate and can vary between high‑street shops and online retailers.
You’ll notice we avoid the “Korda‑only” hype that many brand pages push. The rig ring works just as well without a logo, and the coated braid from Gardner or Korda gives the right semi‑stiff feel without breaking the bank.
Now that you know exactly what to buy, download the Free Beginner Carp Fishing Checklist to verify you’ve got the right components before you head out.
Step‑by‑Step Tying Guide
The whole process should take under ten minutes once you’ve got the parts ready.
- Cut the hook‑link – Trim a 10–12 cm length of your 0.20 mm or 0.25 mm coated braid.
- Slide the rig ring on – Push the ring onto the braid first, leaving about 5 mm of braid protruding beyond the ring.
- Tie the hook – Use a figure‑8 knot (or a knotless knot) to attach the hook eye to the end of the braid. Make sure the hook sits straight; the eye should be in line with the braid.
- Create the hair – Cut a 15–25 mm length of braid for the hair — roughly the diameter of your boilie. Too short and the bait sits against the hook; too long and the hook-hold weakens.
- Attach the hair – Loop the hair around the hook eye and secure it with a tiny loop knot or a second figure‑8. Keep the hair short – a common mistake is making it too long, which stops the rig from blowing back.
- Trim the tag end – Clip any excess braid tag to within 2–3 mm of the knot so the ring can slide freely along the link without snagging.
- Test the movement – Pull gently on the lead; the rig ring should slide forward and snap back to the hook eye when released. If the ring sticks, the hook‑link is still too long.
A semi‑stiff 0.25 mm link is worth its salt for bottom baits; it gives a crisp snap‑back without being so rigid that it twists under a wafter.
When to Use It vs. Other Rigs
Choosing the right rig is all about matching the water and bait. Below is a quick comparison that lets you decide at a glance.
| Condition | Blow‑back rig | Chod rig | Ronnie rig |
|---|---|---|---|
| Lakebed | Silty, gravel, mixed – works spot on with bottom baits or wafters | Heavy silt or very soft mud – keeps bait from burying | Weedy or snaggy water – can tangle, especially with pop‑ups |
| Depth | 2–4 m, calm or slow water | Very shallow or very deep (ring stays clear) | Shallow to moderate, best with pop‑ups |
| Bait type | Bottom bait, wafter, combi rigs | Heavy lead‑bag rigs, PVA bags | Pop‑up rigs, surface presentations |
| Lead weight | 15–20 g (max ≈ 25 g) | 20–30 g, sometimes heavier | 10–15 g for pop‑ups |
| When to avoid | Deep fast flow, lead > 25 g | Very fast flow where the rig can’t settle | Weed‑dense venues where the ring gets caught |
If you’re fishing a typical day‑ticket pit with a wafter or a small bottom bait, start with the blow‑back rig – it’s the only rig you need for most UK venues. Switch to a chod when the bottom is extremely soft and you risk the ring burying, and reach for a Ronnie when you want a pop‑up on a clear, shallow lake.
Fish Welfare and Unhooking
The blow‑back rig is self‑hooking, but you still need to unhook the carp safely.
- Keep the fish in the water – Use a long unhooking mat laid flat on the bank.
- Use a long‑handled unhooking tool – A 30 cm rod‑pod or a dedicated unhooking needle lets you stay out of the water.
- If the hook is deep – Slip a disgorger or long‑nosed pliers onto the hook eye, then gently lift the hook out without pulling the rig.
- Follow Angling Trust guidance – minimise handling time, support the fish’s belly, and release it promptly.
The Angling Trust recommends a calm approach: if you have to lift the fish, do it by the lower jaw and keep the gills moist. A long mat and tool make this straightforward even on busy day‑ticket waters.
Angling Trust Fish Care Guidelines
Frequently Asked Questions
What’s the best way to test if your blow-back rig is tied right?
Take your rigged bait, hold the lead in one hand and the hook in the other. Gently pull the lead away — the rig ring should slide smoothly forward and snap back to the hook eye when you let go. If it sticks, your hook-link’s too long or the braid’s too stiff. You don’t need fancy gear to test this — just your fingers and a calm moment before you cast.
Is a 30g lead ever okay for a blow-back rig?
No. 30g is too heavy. Even 25g is the absolute max. UK anglers on gravel pits confirm the ring just stops sliding beyond that. Go heavier and you’re not using a blow-back rig anymore — you’re just fishing a hair rig with a big chunk of lead. If the bottom’s deep or the water’s running, switch to a chod or a Ronnie.
Can I use this rig with a pop-up?
Not really. The blow-back relies on the bait sitting on or just above the lakebed so the carp picks it up and moves the lead. A pop-up floats, so the fish often takes it without dragging the lead — meaning the ring doesn’t slide, and the hook doesn’t set. Stick to bottom baits or wafters.
How to avoid a tangled blow-back rig on the bank
This is a real problem for beginners. The trick is to keep the rig ring close to the hook when you’re not fishing. After tying, slide the ring down to the hook eye and use a small piece of PVA foam or a rubber band to hold it there. When you cast, the water movement will free it — no fiddling with your fingers on the bank. Done right, it’s one less thing to worry about when the alarm goes off.
What to Do Next
You now have a clear picture of why the blow‑back rig is the go‑to setup for most UK beginners, what you need to buy without splurging on brand‑only gear, and exactly how to tie it so the ring really does “blow back”.
If you’re ready to make sure every component you’ve gathered is spot on, download the Free Beginner Carp Fishing Checklist . It walks you through the gear, the rig‑tying steps, and the safety checks before you head out.
Remember, the blow‑back rig isn’t a fancy gimmick – it’s a solid, forgiving rig that lets you focus on reading the water rather than fiddling with complex gear. Keep it simple, test it on a calm day, and you’ll find the hook‑hold working for you far more often than not.
Still unsure? Get in touch — we answer every email. And if you want to see what the rest of the team’s been testing this season, check out the blog .
Related Guides
For a complete overview, see our Carp Rigs Explained: A Complete Guide for UK Anglers .
As an Amazon Associate we earn from qualifying purchases.